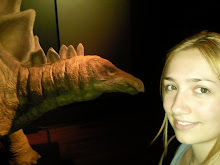
Hope everyone had a great Valentine's Day 2011, whether you have a special someone or not!!
 [Stegosaurlub by DA's Earthknight]
 [Stegosaurlub by DA's Earthknight]


 2) Add the flour and gently mix, adding the milk gradually to the mixture. Make sure that there are no flour or butter lumps... (those are gross in any cake/baked good).

 5) Place the tray in the oven for 25mins or until cupcakes are cooked through - poking a wooden skewer or toothpick in the centre of the cupcake should come out clean when the cupcake is cooked. Place on a cooling rack for 5 minutes before removing from the tin.


 (2) In a separate bowl, combine flour, cinnamon, nutmeg, ginger and bicarb. Gradually add to the syrup mixture, stirring with a wooden spoon. The mixture should become dough-like and will leave the bowl easily without sticking.
 (3) Lightly flour a clean surface and place dough, knead it until it's smooth (don't clean the floured surface, you'll use it again). Roll into a ball, flatten to make a disc and wrap in clingwrap. Place in fridge to rest for 30 minutes.
 (6) Place cut-out cookies on baking paper in 2 trays (I had to use 3), spacing them about 2-3cm apart (otherwise you end up with a MONSTROSITY). Pop in the oven for 10-15 minutes or until they're browned considerably. Take them out at 10 mins and they'll be soft cookies, leave them in a little longer and they'll be a little softer than gingersnaps. Leave on a rack to cool.
 (7) Spoon icing into a piping bag (or if you're a genious, get a ziplock bag, spoon into a corner, twist the bag to seal the icing in and carefully snip the corner). Decorate!!